
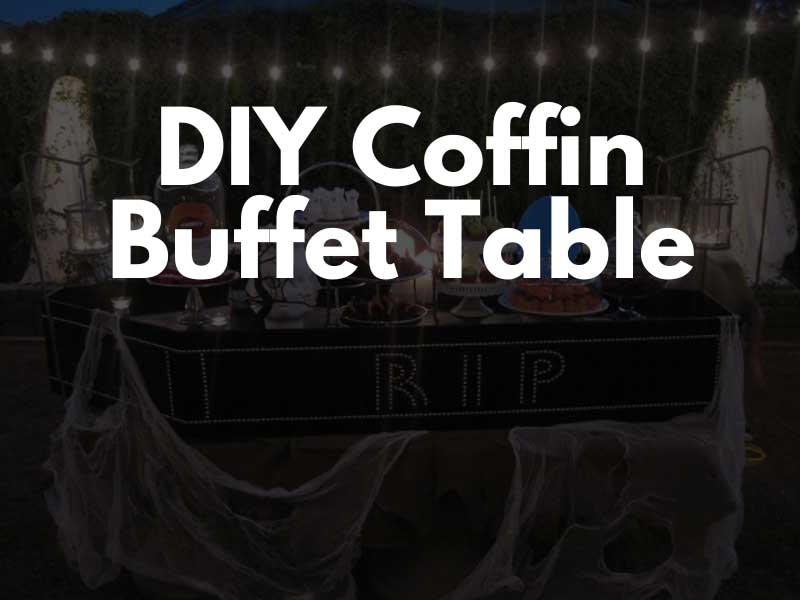
When you attend a Halloween party, does the host serve food on a regular table? Although a regular table will work in a pinch, why not surprise your guests with a DIY Coffin Buffet Table? This amazing Halloween prop will give you ample room to serve ghoulish goodies and devilish delights!
YAY! Halloween is nearly here and it’s, by far, my favorite time of year! My family made a huge deal out of Halloween when my sister and I were growing up. My mom and step-dad took us to haunted houses, we made DIY Halloween props/costumes, and ate an exorbitant amount of candy. Every year we’d try to outdo the last. Those childhood memories are the ones I cherish the most. Fast forward 40 years and I still love Halloween, some would say I’m fanatical about it.
Kieran and I are throwing a Halloween party this year. Our biggest challenge is turning our house into a ghost town without breaking the bank. Neither of us wanted to purchase expensive props so we turned to DIY projects. Our DIY Coffin Buffet Table is inspired by a similar table my step-dad made for my sister when she throws Halloween parties. I took one look at her table and thought, Yeah, I need that in my life.
This year I asked Kieran, Hey, want to help me build a coffin buffet table for our party? Kieran immediately walked over to our whiteboard and asked what I wanted it to look like. A few days later our DIY Coffin Buffet Table was born.
Watch the video to see how we made it:
We made the Coffin Buffet Table for approx $20 because we purchased the majority of the wood/materials at the Rebuilding Center. We choose wood with imperfections so the freshly made coffin would appear old and rickety. The rest of the materials like paint, stain, plywood, hardwood flooring, ect we had on hand. Yes, I said hardwood flooring. We were determined to build the coffin on a budget which means we had to get creative (see video).
Although the video goes into detail on the coffin’s construction, here’s a simplified breakdown on how we built the DIY Coffin Buffet Table.
WHITEBOARD OUR IDEAS
We start every project at the whiteboard. We draw a schematic of how we want the end product to look. We’ll discuss and tweak the design until we’re both satisfied with the end result. Note, sometimes during a build we’ll discover we have to change the design but at least we have a solid game plan, to begin with.
TAPE AND MEASURE
The next step is to outline the floor with painters tape so we can visualize the end product. Once we agree on the project’s size it’s time to measure. Note, sometimes the end project is smaller or larger than we originally conceptualized depending on the side of the wood we find or purchase. We exercise flexibility in these types of situations.
Here are the coffin’s dimensions.
Length: 7.5 feet
Width: 1.5 feet
Depth: 9 inches
OBTAIN THE MATERIALS NEEDED
We make a list of the materials then head to the store. The Rebuilding Center is my favorite place to shop but if they don’t have what we need we’ll hit up Home Depot or Lowes.
Here are the materials we used for the table.
We purchased: 12 pieces of wedged wood for the coffin’s base, lid, and sides. We also purchased the hinges and bottle opener which we attached to the end of the coffin.
What we had at home: plywood, hardwood flooring (for the support beams), stain, and paint.
BUILD
Kieran and I work together to determine how best to assemble a project. He’s usually the lead builder and I’m his assistant, but I’ve signed up for carpentry classes in November so I can do more than assist in the future.
PAINT/STAIN
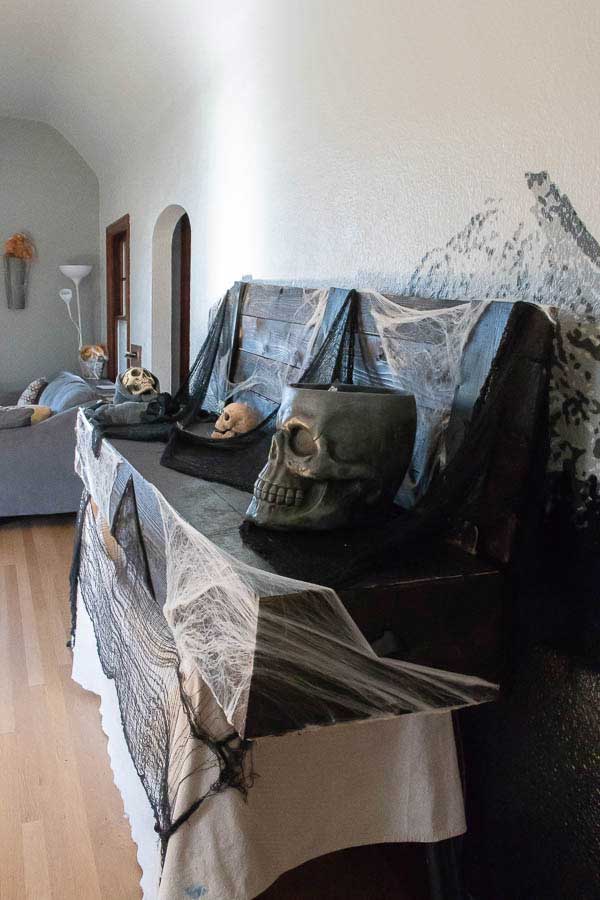
I get the pleasure of painting/staining our projects. Generally, I’ll sand a piece before staining it, but this project didn’t require sanding. We wanted the coffin to look weathered so I stained it as is.
FINALLY ASSEMBLY
Once the stain/paint is dry we screwed the lid of the coffin to the base using the hinges. We also screwed on a bottle opener for fun.
Admittedly we forget to film some steps during our build. If you have questions about this project leave a comment below. We’d be happy to answer any questions so you can build the Coffin Buffet Table of your haunted dreams. Want to know the best part about this project? Since it’s a Halloween prop which is supposed to look old, it’s totally OK if you mess up during the build! Any and all mistakes add to the coffins aesthetic!
Our DIY Coffin Buffet Table was cheap to make and fun to build. It turned out amazing if I do say so myself. It’s such a cool and unique Halloween prop, I can’t wait for my party guests to not only see it but grab food from it! What’s that? Where are we going to store the coffin after Halloween? That’s a good question ?
Halloween has always signified a special time throughout my life. From the memories I’ve made as a kid, to the memories I continue to make as an adult, Halloween will always hold a special place deep in my cockles. What are some of your favorite Halloween traditions?
Whelp folks, that’s a wrap on this DIY Coffin Buffet Table post. I’ve been MIA for a while and have sincerely missed you! I’m debating whether I should post what’s been happening during my hiatus or not. I may open up down the road but now I want to refocus my efforts on creating content you enjoy. Kieran and I are hopping on a plane tomorrow to vacation in Hawaii for the first time! I’m not 100% sure if I’ll be posting next week but look forward to more posts in the future!
Have a great weekend!
Thank you for being apart of the Shock Munch community, I appreciate you!
Sincerely,
Christina
Do you love to build and do DIY projects for your home? You DO?! That’s freaking awesome! After seeing our project, would you have done anything differently? What do you like and dislike? Please leave your thoughts in the comments below! If you like our recipes, hiking adventures, and projects, consider following me on Facebook, Pinterest, and/or Instagram!
You can also visit my YouTube channel! If you like the video please give it a thumbs up and subscribe for more content!
Is this the type of project on your wish list? Pin it for later!