
Unlock the art of crafting your very own Sourdough Starter with minimal effort and basic ingredients. No need for fancy equipment, just six days of patience, and you’ll be on your way to a delightful journey of homemade sourdough bread.
This unique starter, a product of “wild” yeast derived from a blend of flour, water, and the natural yeast wafting through the air, emerges as a superior alternative to the conventional store-bought yeast.
Elevate your baking prowess with this simple yet transformative process, and savor the unmatched flavor and quality of your homemade sourdough.
Sourdough Starter Recipe
Hey there, dear friends! I’ve been holding onto this cherished Sourdough Starter recipe for years, and with many of us finding ourselves confined to our homes, coupled with the scarcity of yeast in grocery stores, now feels like the perfect moment to finally share it. Currently soaking up the winter vibes in Santa Barbara, I realized I forgot to bring along my trusty sourdough starter.
No worries, though—I whipped up a fresh batch last week and treated myself to a heavenly loaf of Sourdough Bread yesterday. The sheer delight I felt from this simple pleasure filled me with wonder. Isn’t the world marvelously alive? And let’s not forget the magical aroma of freshly baked bread, a surefire way to lift the spirits.
If you happen to have a bit more free time on your hands, why not embark on the journey of baking your own sourdough bread from scratch? The possibilities are endless—baguettes, pizza dough, waffles, banana bread, pancakes, crackers, sourdough buns, tortillas, and biscuits, just to name a few.
It’s truly incredible! The foundational steps were graciously shared with me by a friend, who drew inspiration from Breadtopia and King Arthur Flour. I’ve taken some creative liberties and added my touch, but both sources are fantastic references for your sourdough adventure.
Give it a go and discover the joy of creating your own sourdough masterpiece! Your kitchen will thank you.
WHAT YOU’LL NEED
- Jar- A wide-mouth quart jar or a Weck’s 1-liter tulip jar.
- Flour – 5 lb bag of organic bread flour (plus 1 cup organic whole grain flour -optional)
- Water– filtered water, tap water, or mineral water (specifically, San Pellegrino, for the correct mineral ratio). Distilled water does not have enough minerals.
- Scale– using a kitchen scale is optional but handy.
- Thermometer– Knowing the temp of the starter using a thermometer is optional but handy!
WHAT IS A SOURDOUGH STARTER?
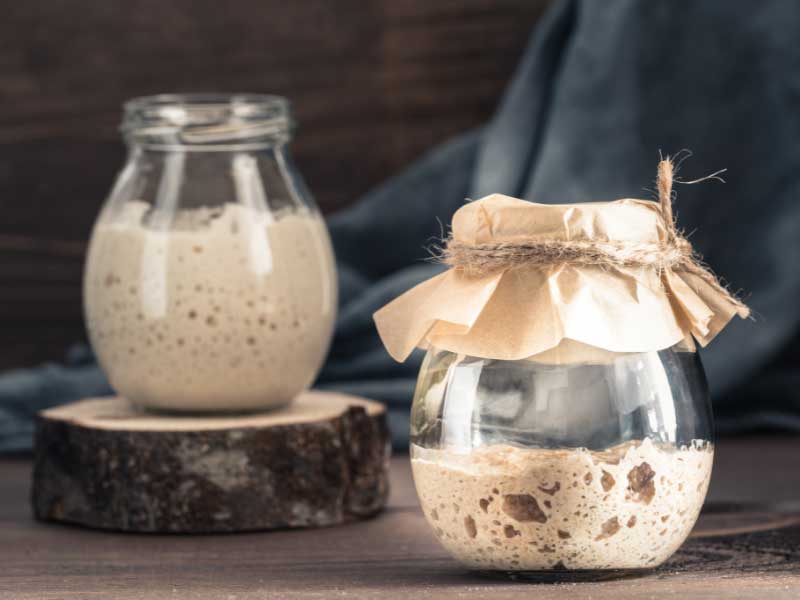
- Think of sourdough starter as yeast. Only in this case, instead of buying a packet of yeast from the store, you are making your own living “wild yeast” by fermenting flour and water. That is it! ONLY 2 ingredients! Once it’s alive, it is like a very low-maintenance pet.
- You must feed it (stir in a mixture of flour and water) once a week to keep it healthy and happy. You know it’s happy when it bubbles. 😉 And YES, you can even name it.
- Some people believe that bread made with sourdough starter is actually better for you than bread made with yeast. Here and Here are a few articles to get you started on your own research. While I’m not sure if this is scientifically proven, I do know that bread made with sourdough starter, tastes infinitely better, feels easier to digest, and has more complexity and better texture, than bread made with commercial yeast. So if you are a bread lover- this is absolutely the way to go, as far as the quality of your finished bread.
WHAT IS FEEDING?
- Feeding your sourdough starter is basically adding a mixture of flour and water to your existing starter, to keep it alive, happy, and nourished. Starter is full of wild yeasts that get hungry, just like we do. These yeasts need “food” -in this case, more flour, to stay healthy and active.
- How often you feed depends greatly on the temperature of your home. The starter will metabolize the flour more quickly in warm environments, and more slowly in cold environments (like the fridge). If you keep your starter in the fridge, you should only need to feed it once a week. If you keep it on the counter you may need to feed it 1-2 times daily, and sometimes more if you live in warmer climates.
SOURDOUGH STARTER (STEP-BY-STEP INSTRUCTIONS)
Embark on the delightful journey of crafting your own Sourdough Starter, a process spanning a mere 6 days (or extend it to 12 if you prefer a cooler pace). Fear not, for simplicity reigns in this method—a tried-and-true approach that has never failed me. While more intricate recipes may beckon to those seeking a nerdy, in-depth experience (which, let’s be honest, is always a good thing, especially in times like these), this one ensures a seamless and satisfying result. But hey, if you’re feeling the urge to completely nerd out, go ahead and indulge—feed your fancy! For those who prefer a visual guide, don’t miss the 20-minute Sourdough Video above!
Now, let’s dive into the daily breakdown:
Day 1:
Begin either in the morning or at night. Grab a wide-mouth quart jar, tulip jar, Crock, or Glass Measuring Cup. In this vessel, combine 1 cup of whole grain flour (fluffed, spooned, and leveled)—equivalent to 120 grams—with 1/2 cup (120 grams) of filtered water. A fork or chopstick will do the mixing, ensuring the dry flour is fully incorporated into the blend.
Gently place the lid on top (opting for the Weck jar is particularly handy) or cover it with a damp towel, plastic wrap, or any moisture-sealing method of your choice. Allow the concoction to rest at room temperature (around 70 degrees) on the kitchen counter for 24-48 hours. If uncertain about the temperature, a kitchen thermometer can provide clarity after a few hours. Refer to the notes for guidance on temperature.
TIP: For the initial measurement, consider using a kitchen scale to weigh the flour, giving you a tactile sense of the desired texture. Avoid weighing the cup itself. Aim for a consistency akin to a thick paste, reminiscent of peanut butter. Should the need arise, adding a touch more water to incorporate the flour is perfectly acceptable.
Day 2:
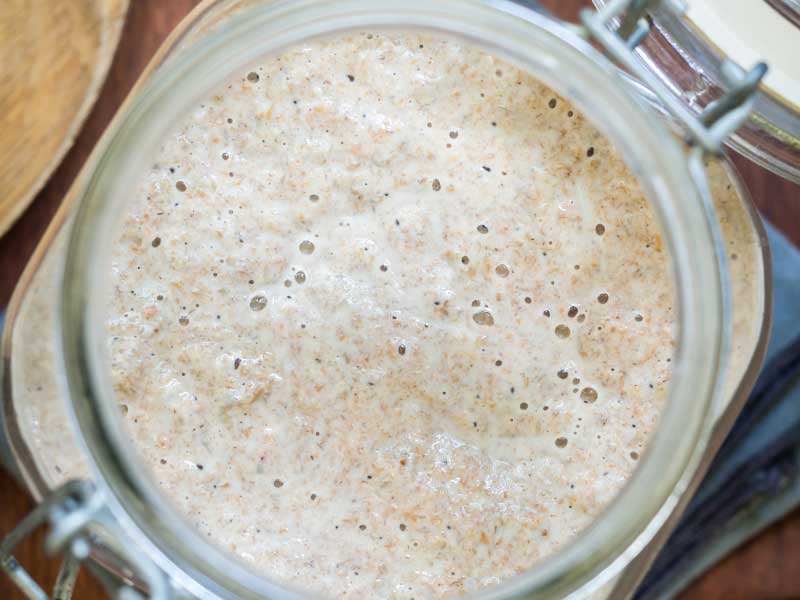
Following the initial 24 hours, expect some bubbling activity, although it might be subtle. Allow the mixture to rest until signs of life emerge—be it bubbles or a rise. Sometimes this process takes up to 36 or even 48 hours in colder conditions. Once you witness active bubbling, discard everything except 1/2 cup of the starter (equivalent to 4 ounces).
To the retained ½ cup of starter, blend in 1/2 cup of water (120 grams) thoroughly using a fork. Add 1 cup of organic bread flour (120 grams), spooned and leveled, and stir until a well-combined, thick paste forms. If it feels excessively dry, don’t hesitate to introduce a bit more water.
Cover the mixture anew and let it rest at room temperature for another 24 hours.
Day 3:
After another 24 hours, anticipate bubbling or a rise in the mixture. If not, exercise patience and extend the duration until signs of activity manifest. Depending on the ambient warmth and the starter’s vigor, you might need to adjust to more frequent feedings or even introduce two feedings a day—morning and night.
In essence, the key is to feed the starter post-peak, discerned when it has metabolized the flour from the previous feeding, exhibiting a slight descent or liquidity. This is the telltale sign of hunger!
The time required for the next phase can vary significantly—perhaps 12 hours, possibly 14, maybe 18, or even 24, contingent on your home’s temperature. In warmer climates, the process might unfold in a brisk 6-8 hours, while winter’s chill could extend it to a leisurely 36 hours. It’s prudent to err on the side of underfeeding rather than overfeeding in this stage.
With each feeding, as before, retain only about 1/2 cup of the STARTER (keeping approximately ½ cup in the jar). Introduce 1 cup of Bread Flour (spooned and leveled) and 1/2 cup of water to the retained 1/2 cup starter. Allow this amalgamation to rest at room temperature for 12-24 hours or until the starter exhibits signs of “hunger” before proceeding.
Day 4:
Feed the starter 1-2 times, discarding all but 1/2 cup of starter EACH TIME. Add 1 cup bread flour and 1/2 cup water per feeding. Day four typically marks a slow down and a slight stall for the starter. Fear not, this is normal. Continue the process, observing the hunger signs, and only feed when the hunger is evident. Signs may include a liquid layer on top or a very runny consistency, to the extent that it can pour out of the jar. Look for the visual cues of rising and falling. Consider transferring the starter to a clean jar daily, marking the initial level for easy tracking.
***If, for any reason, your starter still appears to be rising during the second feeding at night, and there’s no evidence of it falling or leaving slide marks, skip this feeding and resume first thing in the morning.
Once again, feeding it when it is “not hungry” risks diluting the growing yeast, rendering it lethargic. Starving is preferable to overfeeding.

A visual feast awaits above as you witness the starter reaching its pinnacle, followed by a descent below where it deflates and exhibits unmistakable signs of “hunger.” Timing for this hunger phase can vary widely, so while a loose schedule is presented, bear in mind that your starter operates on its own unique timetable. It’s a living entity, demanding your attention, so observe and be attentive!
Let me emphasize: Watch it closely. Only feed the starter when it displays signs of hunger. Overindulging a starter could lead to lethargy.
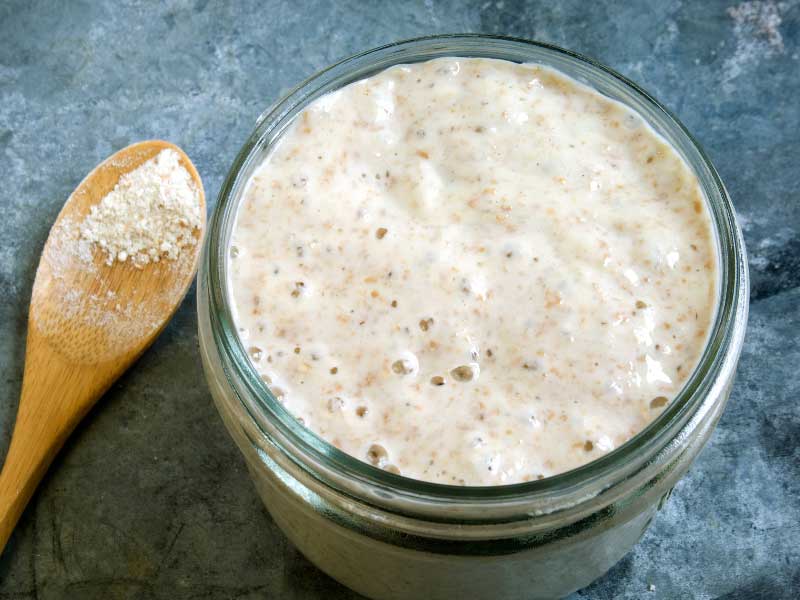
Keep an eye out for the hunger indicators: watery bubbles at the top or even a layer of liquid. Take note of how the starter gracefully slides down the side of the jar, leaving “slide” marks just below the Weck logo.
If your starter isn’t undergoing the expected rise and fall, assess its consistency. As it consumes the flour and grows hungry, it will transition into a runny, liquid state—reaching a point where you can effortlessly pour it out of the jar. If it maintains a thick, paste-like consistency, it signifies that it’s still in the process of metabolizing (eating) the flour.
Day 5:
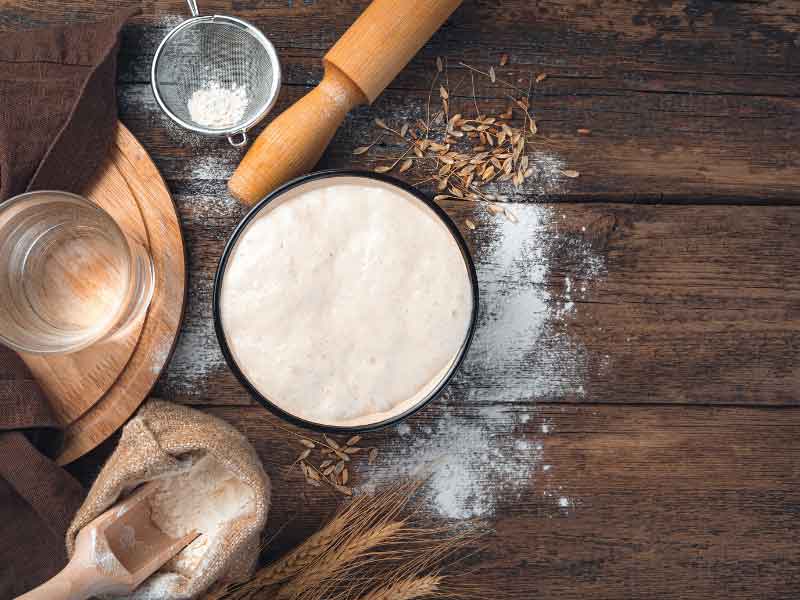
Continue the feeding regimen, ideally 1-2 times, spaced around 12 hours apart. Each time, discard everything but 1/2 cup of the starter. Introduce 1 cup of bread flour and 1/2 cup lukewarm water. A visually active starter is the goal—bubbling, rising, and hopefully approaching a doubling in size.
You might find it necessary to repeat Day 5 until the starter exhibits a predictable rise and fall, nearing a doubling in size within a more expedited 6-8 hour timeframe.
TIP: If your starter shows signs of hunger (liquid at the top) without the expected rise, consider three adjustments: incorporate 1/4 cup whole grain flour (adding to 3/4 cup white bread flour) in the next feeding, use mineral water like San Pellegrino instead of regular water, and stir the starter a couple of hours after feeding to introduce wild yeast from the environment.
DAY 6:
Baking day! Commence with one last morning feeding. Discard all but 1/3 cup (adjusting slightly for a bit more nourishment). Introduce 1 cup flour (120 grams) and 1/2 cup water, placing it in a clean jar for clear observation. Mark the initial level with a sharpie or a rubber band. The aim is for the starter to double in volume within 6 hours of feeding.
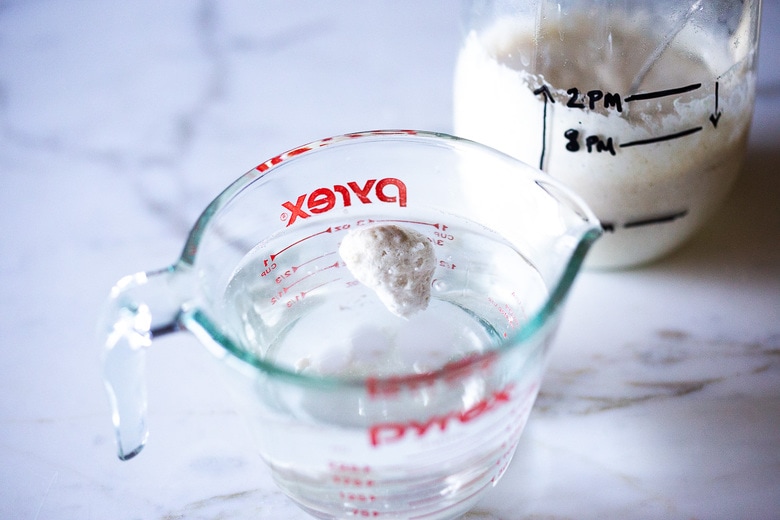
Conduct the FLOAT TEST: Extract a teaspoon of starter (from the top without stirring it down) and place it in a glass of water. It should ideally float. If it does, congratulations, you’re ready to make bread—tonight! If it doubles but doesn’t float, you can still attempt baking. Allow the starter to rest at room temperature for at least 8 hours to fully metabolize the flour, possibly sinking a bit before crafting your dough.
Should your starter not double within the stipulated 6 hours, don’t lose heart. Sometimes, especially during winter, it takes a bit longer. Continue the feeding routine one to two times a day until you observe a consistent, predictable rise and fall.
Refer to the troubleshooting section for guidance. If needed, take a hiatus by placing it in the fridge and revisit the process up to a week later. Remember, don’t discard it—there’s potential in every nurturing step.
Day 6 :
Evening Now, the moment of truth—utilize 1/3 cup of your diligently nurtured starter to fashion your sourdough bread if you’re feeling inspired. For the remainder of the starter (or the entirety if bread isn’t on the agenda), stow it away in the refrigerator. Remember, it’s your sourdough charge, and it deserves a cozy spot in the cold.
For optimal care, make it a weekly ritual to visit your sourdough friend in the fridge. Prior to feeding, mingle in any liquid that may have formed on top. Reserve ½ cup of the starter and then embark on the usual feeding routine—1 cup of bread flour and 1/2 cup water. This ensures a happy and well-fed starter, ready to bring life to your future baking endeavors.
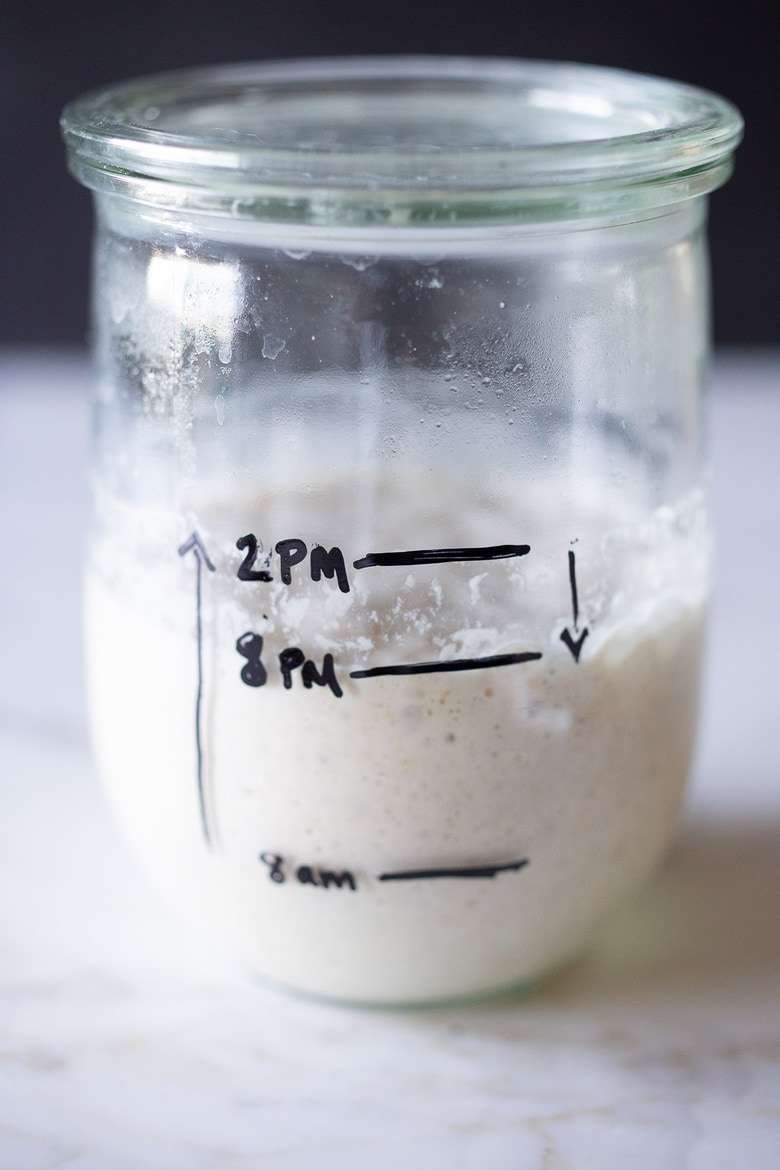
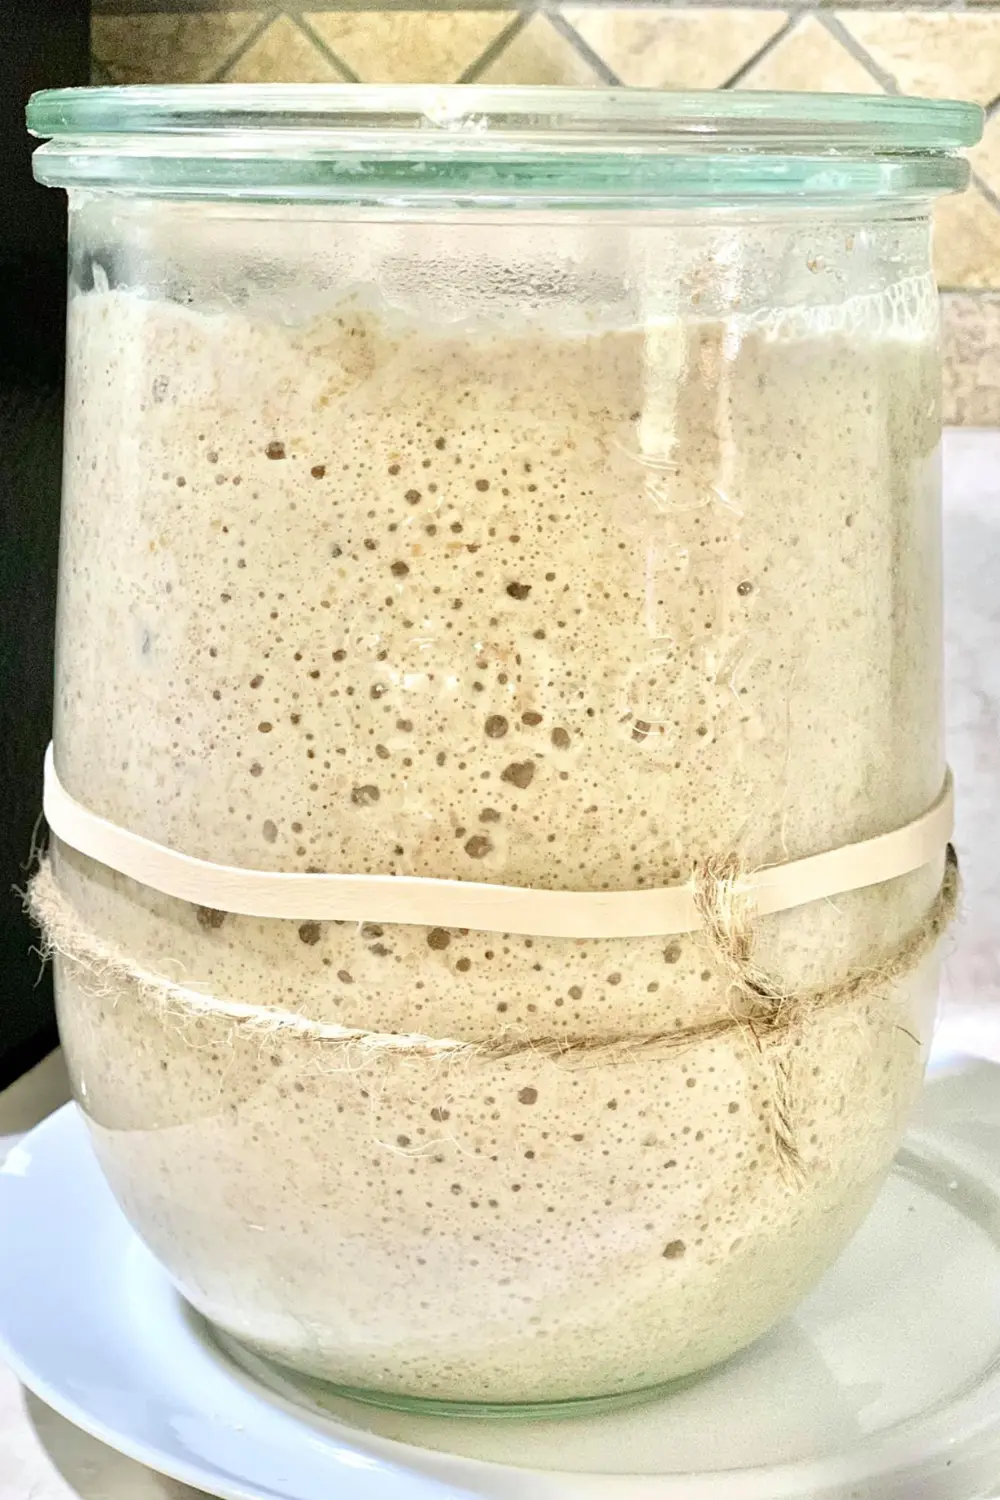
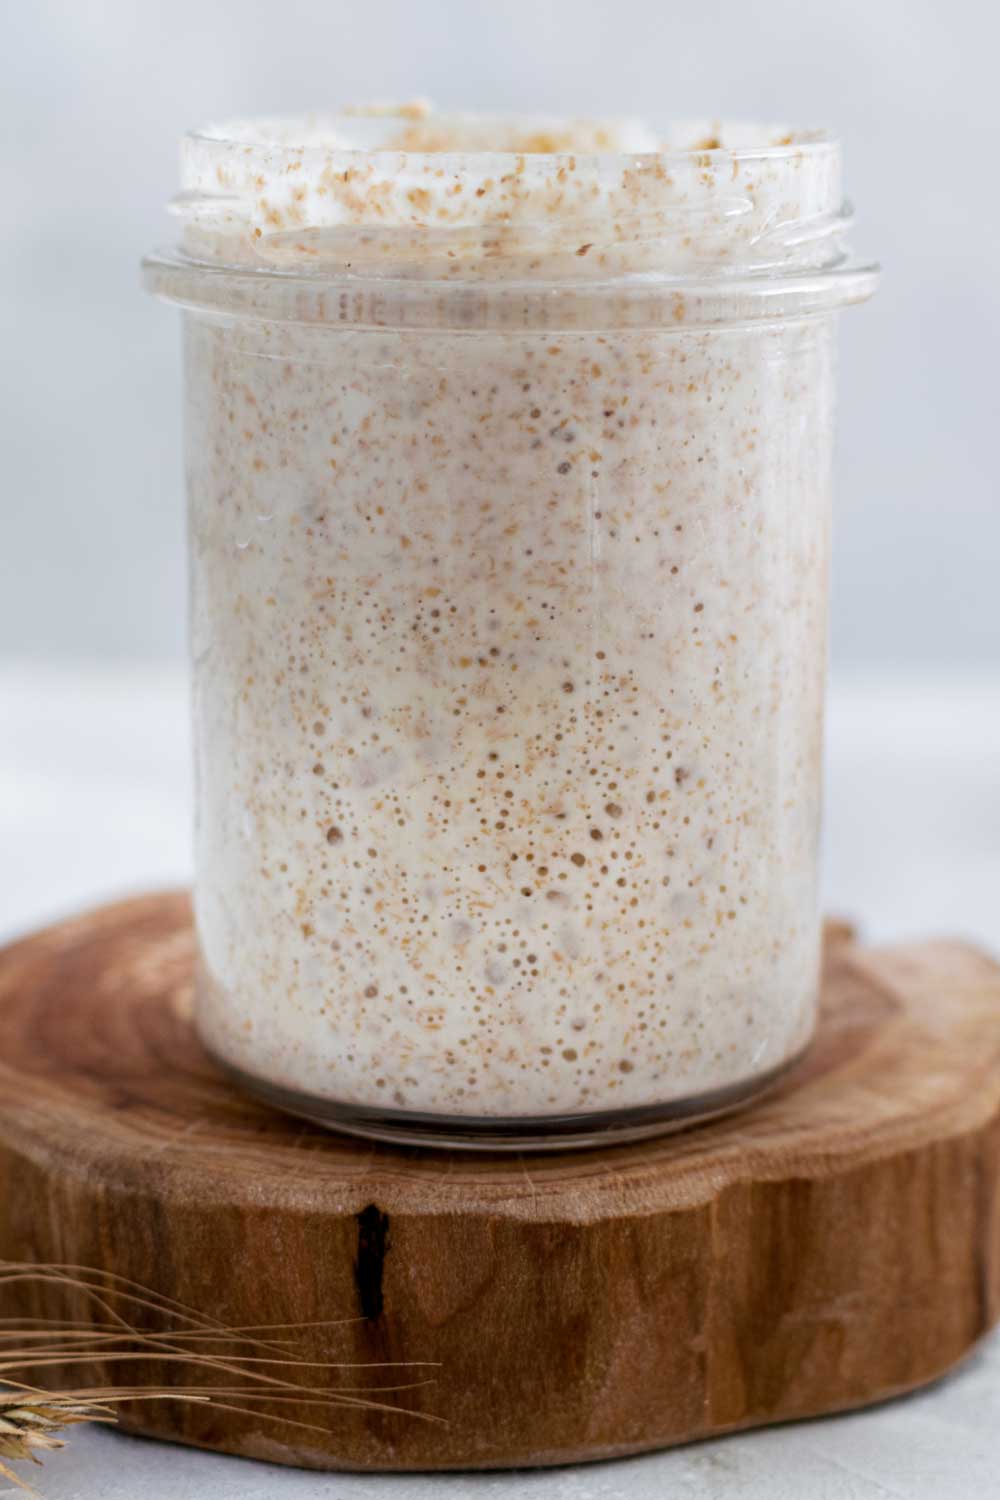
In the image above, captured on the 6th day, the starter experienced a feeding at 8 am, swiftly doubling by noon and reaching its zenith around 2 pm. At this peak, the enthusiastic rise was evident. Subsequently, a gentle deflation commenced, as depicted by the discernible downward “slide” marks on the jar. By 8 pm, the starter exhibited a lower level, signaling its return to a “hungry” state.
Pay keen attention to these distinctive “slide” marks—they are your silent guides, narrating the height your starter achieved, affirming that it has peaked and is now on a downward trajectory. Opting for a clean jar enhances visibility, allowing for a clear interpretation of these markings. They serve as a visual cue, indicating the peak and subsequent decline. Even at 8 pm, the starter successfully passed the “float” test, affirming its readiness. It was at this juncture that I commenced crafting a loaf of my cherished sourdough bread.
TIP: When venturing into the realm of bread-making, target starter that has already peaked for optimal results.
SIGNS OF HUNGER:
- Slide marks (be sure to use a clean jar so you can see these clearly).
- A layer of liquid at the top of the starter
- The starter is thin and liquidy enough to pour out of the jar (when at room temp).
TROUBLESHOOTING:
- SMELL:
Your starter should emit a delightful aroma—sweet, tangy, earthy, akin to a wet horse (but definitely not “bad”). If an unpleasant or foul odor dominates, it’s a red flag. This could be attributed to using an unclean jar, utensils, or inadvertent introduction of undesirable bacteria. In such cases, starting afresh might be the wisest course of action. - NO ACTION:
Around Day 4-5, it’s common for the starter to exhibit a slowdown. If it shows no signs of rising but hunger indicators persist (liquid at the top or bubbles), consider these three troubleshooting steps. First, substitute 1/4 cup whole grain flour (added to 3/4 cup white bread flour) in the next feeding. If there’s still no rise, try using mineral water, particularly San Pellegrino, instead of regular water. Stirring the starter a few hours after feeding, multiple times throughout the day, allows wild yeast from the environment to join the mix. As a last resort, consider using pineapple juice instead of water. - FLOUR:
Opt for fresh milled whole grain flour initially, then transition to organic BREAD FLOUR. Smaller brands like Bob’s Red Mill, rich in wild yeast, often outperform larger, overly processed conventional brands. Feel free to experiment with different flours to introduce a variety of wild yeast strains. - DO NOT OVERFEED:
Avoid overfeeding, as it weakens the starter. Feed it after it has peaked and deflated, indicating hunger. Diluting the starter by feeding it before it metabolizes all the flour compromises the bacteria. If you notice a liquid consistency or it becomes runny enough to pour out of the jar, these are signs of hunger. - TIME:
In colder environments, the process may extend beyond 6 days. Ensure a warm environment, perhaps in the oven with the light on or in an upper cupboard. Patience is key; it might take 12-14 days. If progress stalls, leave it on the counter for 24-48 hours before making a decision. If a break is needed, store it in the fridge and revive it later. - ACIDITY:
Struggling to kickstart your starter? Some suggest using pineapple juice for one feeding to elevate acidity levels. - LIQUID:
If you spot liquid on top, your starter is hungry. Stir it in or pour it out, but don’t forget to feed it. This indicates a need for more frequent feedings. - MOLD:
Discoloration or mold on the surface might signal contamination. If it’s only surface-deep, scrape it off, save 1/2 cup of the unaffected starter, and proceed with caution. Trust your judgment. - FLOAT TEST:
For a reliable float test, conduct it when your starter is peaking. If it consistently rises and falls but fails the float test after 8-10 days, consider baking a loaf—success is still possible, especially considering flour variables.
HOW TO MAINTAIN YOUR STARTER:
- REFRIGERATE & FEED AT LEAST ONCE A WEEK:
Establish a dedicated day for your sourdough maintenance routine, striving for consistency. Without fail, reserve 1/2 cup of the starter and nourish it with 1 cup of flour and 1/2 cup of water. The excess can be discarded, shared, or saved in a separate container for delightful creations like waffles, pancakes, sourdough buns, banana bread, or biscuits. Personally, I tend not to feed the discard unless it finds a new home. - In case you miss a weekly feeding, fear not; your resilient starter can likely endure. To revive it, feed it 1-2 times a day for 1-3 consecutive days, allowing it to bask on the countertop until it becomes bubbly, active, and achieves a doubling in size within 6 hours. I’ve even left my starter untouched for a month in the fridge while on vacation and successfully resurrected it with a dedicated 3-day feeding routine, 1-2 times a day. It’s surprisingly robust. For more extended storage, freezing is also an option.
- This batch equips you to bake 2 loaves of bread per week with ample leftovers for the next week’s feedings. Should the baking bug bite more frequently, you have options. Keep it out and feed it 1-2 times daily for more frequent baking sessions. Alternatively, if baking every few days, extract it from the fridge, feed it 10 hours before use, utilize what’s needed during its peak (or slightly after), and return it to the fridge that evening. Repeat this process a few days later when ready to use again. This translates to feeding 2-3 times a week, ideal for a baking cadence of 4-5 times a week.
TIPS ON SOURDOUGH STARTER:
- TEMPERATURE:
The ambient temperature significantly influences the growth and activation of your starter. In a colder home, patience is key as it will take longer to witness those lively bubbles. Seek warmth in your home, ideally between 70-80 degrees. Consider spots like the stovetop with the light on, on top of the fridge, in the oven with the light on, or atop a heating pad set to low with a towel in between. Even in a colder setting, the starter will flourish, albeit at a slower pace—possibly up to 2 weeks. Verify the temperature with a reliable thermometer. - FLOUR:
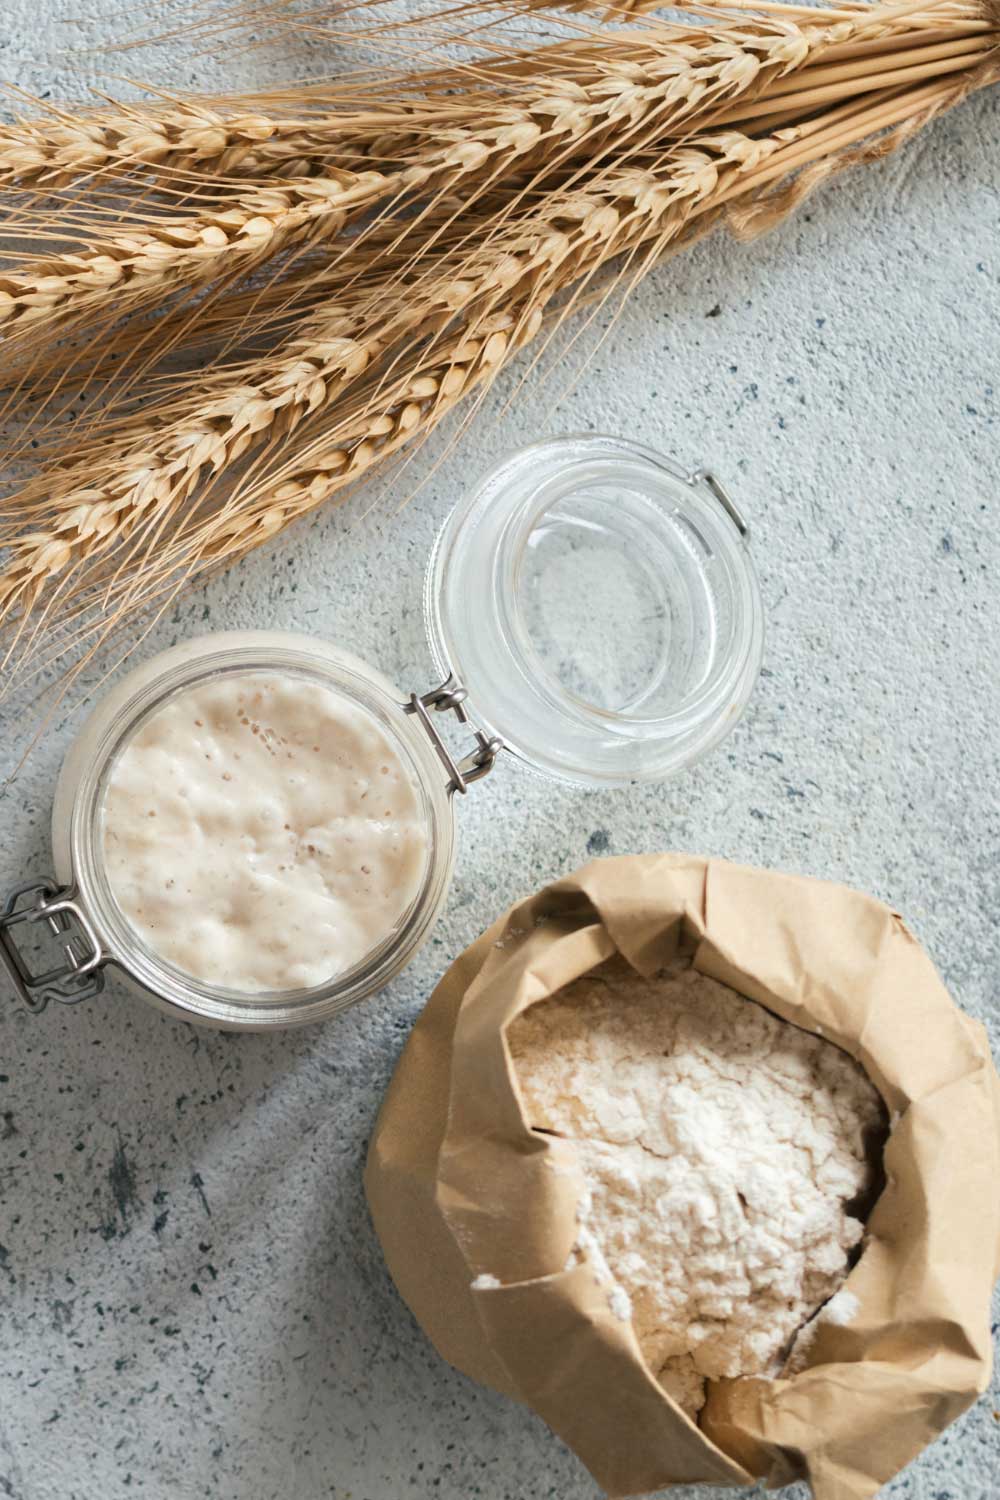
Initiate your batch with organic whole-grain flour, preferably wheat or rye. Whole grain boasts a rich reservoir of wild bacteria, expediting the activation process. While you can persist with whole grain, using organic white “bread” flour from day 2 to 6 is a cost-effective approach. Alternatively, incorporate organic all-purpose flour, although starting with whole grain and transitioning to bread flour has yielded superior results for me. Feel free to experiment, and if your starter requires a boost, a dash of whole grain mixed with white could do the trick. - WATER:
Chlorine in tap water might impede your starter’s growth. Some remedy this by leaving tap water out in an open container overnight to allow chlorine to dissipate. Opting for lukewarm water accelerates fermentation. Consider mineral water like Perrier, or carbonated mineral water, as an effective alternative to tap water. - HYDRATION:
Maintain a 100% hydration ratio for your starter, implying equal weights of water and flour. This typically translates to 1 heaping cup of flour and 1/2 cup of water. Precision enthusiasts may prefer weighing for consistency. Initially, weighing can provide a valuable sense of the mixture’s texture. - STORING AND FEEDING:
Cold storage, like in the fridge, necessitates feeding only once a week. If left on the counter, the regimen shifts to twice a day. Cold slows fermentation, while heat accelerates it. - USING:
When employing your starter for baking, feed it 4-8 hours before incorporating it into the dough. Utilize it at peak height or slightly thereafter for optimal results. - DISCARDING:
Yes, discarding might seem counterintuitive, but during the initial week, it’s a crucial step. This practice streamlines the fermentation process, reduces the flour requirement, and fortifies the starter. Once the starter is established after the first week, you can refrain from discarding and instead incorporate it into various culinary creations or share it with a friend.
Best Sourdough Starter Recipe
Equipment
- Wide-mouth quart jar
- Tulip jar
- Kitchen scale
Ingredients
- 120 gram whole grain flour (whole wheat flour, rye flour, or freshly milled flour) 1 cup, fluffed, spooned and leveled
- Organic White Bread Flour (5-10 lb bag ) I like Shepherd’s Grain or Bob’s Red Mill.
- 120 gram Water per feeding ( 1/2 cup water)
Instructions
- Day 1: Starting in the morning or at night, using a wide-mouth quart jar or Crock or Glass Measuring Cup mix 1 cup whole grain flour (120 grams) with 1/2 cup (120 grams) filtered water using a fork making sure you’ve incorporated all the dry flour. For your first measuring – it is a good idea to weigh the flour, using a kitchen scale so you get an idea of how thick it should feel. It should be like a thick paste. Thick like peanut butter. If you need to add a little more water to incorporate the flour, that is OK, but be precise with the flour. Place the lid on top (using the Weck jar is really handy here) or a damp towel to keep moisture in, or plastic wrap- and let sit at room temperature (70-80 degrees) on the kitchen counter for 24-48 hours, or until you see some bubbling. If you are not sure how warm it is, use a kitchen thermometer and check it a few hours later. See notes for TEMPERATURE.
- Day 2: After the first 24 hours, you may or may not see a bit of bubbling. I prefer to let this rest until I see a tiny bit of activity (bubbles) and sometimes this takes 36 or up to 48 hours. So start “day 2”, when you see a little bit of bubbing. Discard all but 1/2 cup (136 grams) of the starter. (See notes for discard). Add to the remainder, 1 cup of white bread flour, (120 grams), spooned and leveled, and 1/2 cup filtered water (120 grams), mixing well with a fork. Place the lid on loosely again and allow the mixture to sit at room temperature (70-80F) for another 24 hours.
- Day 3: By the third day, you should definitely see some bubbling- and if not, let it go a bit longer. Depending on how warm your house is and how active your starter, you may need to begin feeding more often, or even move to two feedings a day roughly 12 hours apart, like in the morning and at night. In a nutshell, you want to feed the starter only after it has peaked (metabolized all the flour from the last feeding) and has started sinking down or gets liquidy- this is when it is hungry! This might be 12 hours, it might be 14, it might be 18, or 24, depending on the temp in your house. In very warm climates it may only be 8 hours. It is better to underfeed rather than overfeed here. For each feeding, like before, discard all but 1/2 cup of the STARTER (keeping roughly ½-cup of starter in the jar -4 ounces or 136 grams) Add 1 cup Bread Flour (spooned and leveled) and 1/2 cup water to the 1/2 cup starter and let this rest at room temperature for 12-24 hours or until the starter looks “hungry” again before repeating.
- Day 4: Feed 1-2 times, discarding all but 1/2 cup of starter EACH TIME. Feed 1 cup bread flour, 1/2 cup water. Look for the hunger signs. Hopefully, you’ll begin to see some rising and falling. It’s helpful to put the starter in a clean jar and mark the beginning level (with sharpie, string or rubber band) so you can easily see this. ***If for some reason your starter looks like it is still rising at the time of second feeding (at night) and there is no evidence it has fallen or no slide marks, it is still “eating” so skip this feeding and feed first thing in the morning. AGAIN, Feeding it when it is “not hungry” will basically dilute all the growing yeast and make it lethargic. Better to starve than overfeed.
- Day 5: Feed again, 1-2 times, roughly 12 hours apart, or when hungry, discarding all but a 1/2 cup the starter EACH TIME. 1 cup bread flour, 1/2 cup lukewarm water. The starter should look active, bubbling, rising, sliding down, hopefully, close to doubling in size. (If not, repeat this day until starter doubles in size within 8-12 hours of feeding- and read the troubleshooting section.)
- DAY 6: Give it one last feeding. Discard all but a 1/3 cup. Add 1 cup flour ( 120 grams) and 1/2 cup water, and place it in a clean jar so you can see the action clearly. You can use a sharpie or place a rubber band around the jar to mark the beginning level. The starter should hopefully double in volume within 6 hours of feeding. When it peaks, DO THE FLOAT TEST: To test the starter, place a teaspoon of starter (just from the top, while it is peaking, don’t stir it down) in a glass full of water, it should hopefully float. If it does, you can make sourdough bread. Tonight! Let the starter keep resting at room temperature or a few more hours allowing it to fully metabolize the flour, perhaps sinking a little before making your dough. You want to make dough with slightly hungry starter. Place the remaining starter in the fridge and feed it in a week. You’ll have enough stater to make one more sourdough loaf during the week, and still have enough to feed. If you want to wait to make bread until later in the week place starter in the fridge. Be sure to feed it in 7 days. Read maintenance section.
- At this point, if your starter does not double in size don’t give up! Often it just takes longer, sometimes up to two weeks, especially if it’s cold. Continue feeding one-two times a day (only when hungry) for a few more days, until you see a visible rise and fall. Read the troubleshooting section. If you need to take a break, just put it in the fridge and try it again up to a week later. Don’t toss it- if there are bubbles, it is still alive.
- This batch of starter will make two loaves of bread with enough left over to feed for the following week.
Notes
- TEMPERATURE: The colder your home, the longer it will take for the starter to grow and become active (bubbles). Find a warm spot (70-80 degrees) for the best results. On the stovetop, with the light turned on, or on top of the fridge. Or in the oven with the light on. On top of a heating pad (set to low) with a towel in between). You can still make the starter in a colder home, it will just take longer- even up to 2 weeks.
- FLOUR: Always try to start the batch by using organic, freshly milled whole-grain flour (wheat or rye) because it has more wild yeast in it than All-Purpose or white flour and will get it active and growing sooner. You can, of course, continue to use whole grain, but I’ve had the best luck using organic “bread” flour for days 2 through 6. People have made a sourdough starter with All-Purpose flour- but personally, this has never worked for me– there are fewer nutrients and wild yeasts in the flour and results in a very lethargic starter. If it is your only option, try mixing in 2+ tablespoons of whole-grain (wheat or rye) with the AP flour per feeding. Feel free to use different flours or mix different flours together. It is OK to use all-purpose flour if in a pinch, but using it repeatedly will result in sad starter.
- WATER: I usually use tap water -but sometimes the chlorine in tap water can inhibit the growth of your starter. Lukewarm water helps fermentation to start faster. Sterilized bottled water is often overly sterile, and can also inhibit. Mineral water, like Perrier (carbonated is OK) can sometimes work miracles.
- HYDRATION: Hydration refers to the ratio of water to flour in terms of weight. It is a ratio. The starter is typically at 100% hydration- meaning equal parts flour and water, in terms of weight. So if you use 120 grams of water, use 120 grams of flour. This roughly translates to 1 cup of flour and 1/2 cup water. Feel free to weigh instead of measure if you want to be more precise, or want to familiarize yourself with the consistency you are aiming for. If using whole grain flours (which tend to be “thirstier”) and your starter seems very thick, it is totally OK to add more water to thin it a bit. I intentionally keep the hydration a little lower here (a thicker starter) so you can more clearly see the rise and fall “action” in the jar.
- STORING AND FEEDING: When your starter is kept cold, in the fridge, you don’t need to feed it as often- only once a week. Feel free to feed it “cold”, and put it right back in the fridge if you like. If you keep it out on the counter, you’ll likely need to feed it 1-2 x daily (or just watch and feed only when hungry). Cold slows down the fermentation, heat speeds it up.
- USING: When you need to use your starter for baking bread, feed it 10-12 hours before making bread dough, using it after its peak height. For a more “sour” flavored bread, use the starter straight from the fridge, 3-6 days after feeding. The starter gets more sour tasting the longer it goes without feeding. Feeding the starter the same day as making bread will produce a milder sourdough flavor.
- Do I REALLY have to discard my starter? BASICALLY YES. I know it seems wasteful– but while you are building your starter, during the first week, it is the simplest, easiest, fastest, and most economical way to create healthy a starter. (Or save it separately -in the fridge- and use it in Pancakes, Waffles, Buns, or Biscuits. ) This is because you always have to feed it 2 times its volume in flour. For example-if you kept all the 1 1/2 cups of starter, you would have to feed it 3 cups of flour (instead of keeping just a 1/2 cup and only feeding it ONE cup). Doing this will shorten the fermentation process, require less flour in the long run, and create a stronger starter. Once your starter is “established” after the first week- then you can give it away to friends, use it in pizza dough, banana bread, waffles, pancakes, buns, etc) or give it to a friend. If you would like to save your “discard” during the first week – use it as you would flour and water, not expecting any rise.